The following is a somewhat disjointed description of
one of my major projects - a blanket chest. The construction was spread
out over a couple of months. I tend to lose interest after getting a project
started and the bugs figured out, so my focus usually strays in large
projects like this. There aren't really any detailed plans available,
as I tend to design a project to fit available materials. The actual finished
size is 44" wide, 25" deep and 22" tall. In retrospect, it's too large. A foot narrower and a cuple inches less deep would probable be better.
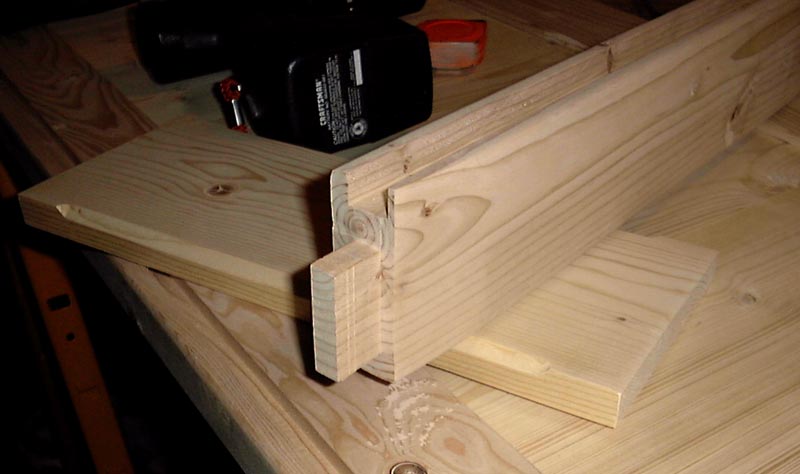
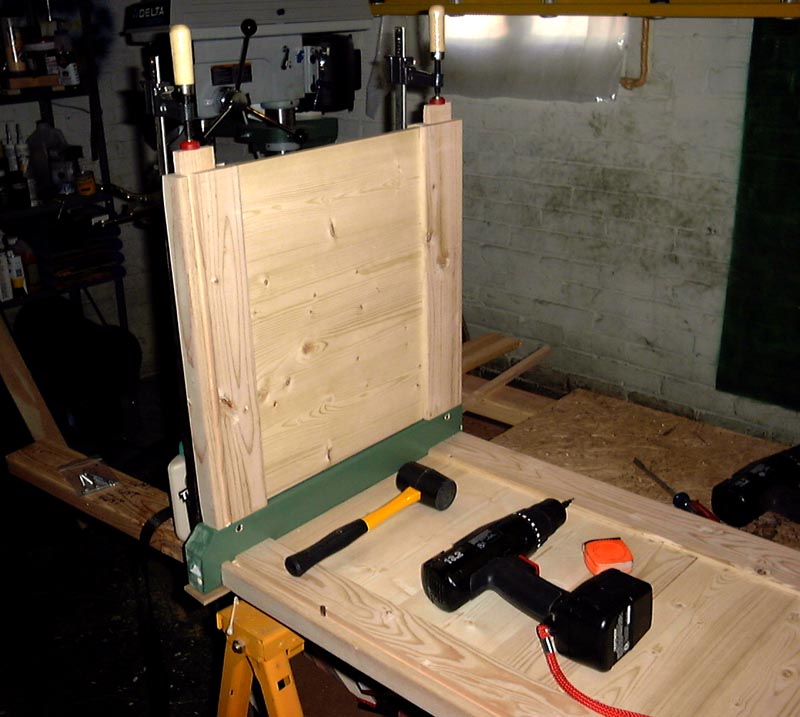
1) The first cuts. The bottom and top cross pieces are 2x4s that have a dado on one edge to hold the uprights and have a tenon cut on each end. The bottom cross piece has an additional dado for the plywood bottom. There are slight tapers on the front of each of the pieces to allow some relief of the corners. The upright corners are 2x4s with a mortise and an angle cut for the foot. In this photo, the cross piece is resting on a 1x6 that makes up the walls. The outside corners of the 1bys have a 1/4" 45 degree chamfer.
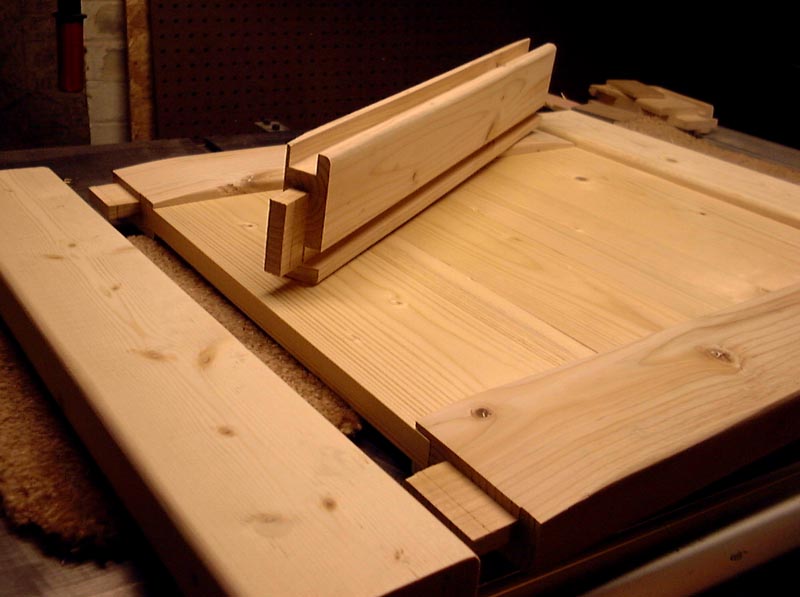
2) Tab A Goes Into Slot B. The panel on the bottom has the outside facing up. The tapers can be seen near the tenons.
The piece on top is a bottom section with the dado to hold the 1/2" plywood floor.
3) Morris Dancers. Er, mortise, not morris. The corner uprights each have four mortises. This one still needs the slight angle cut on the bottom for the foot.
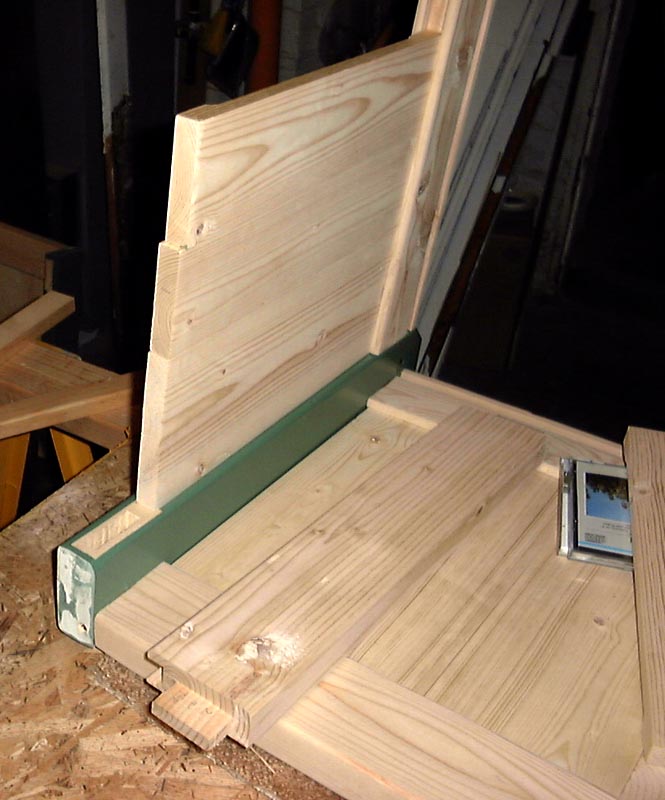
4) Don't Sneeze. Here's a corner being assembled. The upright piece is now painted green. Some idea of how the sides are held together can be seen here. The forefront of the photo is the top of the box. The rather grungy looking end of the upright will eventually be covered by a sliding shelf unit. If you look closely at the bottom (back of picture) of the green upright you can see the angle cut that forms the foot. And yes, I'm using a rather tacky screw method of locking in the mortise and tenons after gluing.
5) Clamps 101. It's all coming together. Notice the rubber hammer to persuade some of the more obstinate pieces to get along. The front/back has already been assembled and one end is being clamped with a couple of bar clamps.
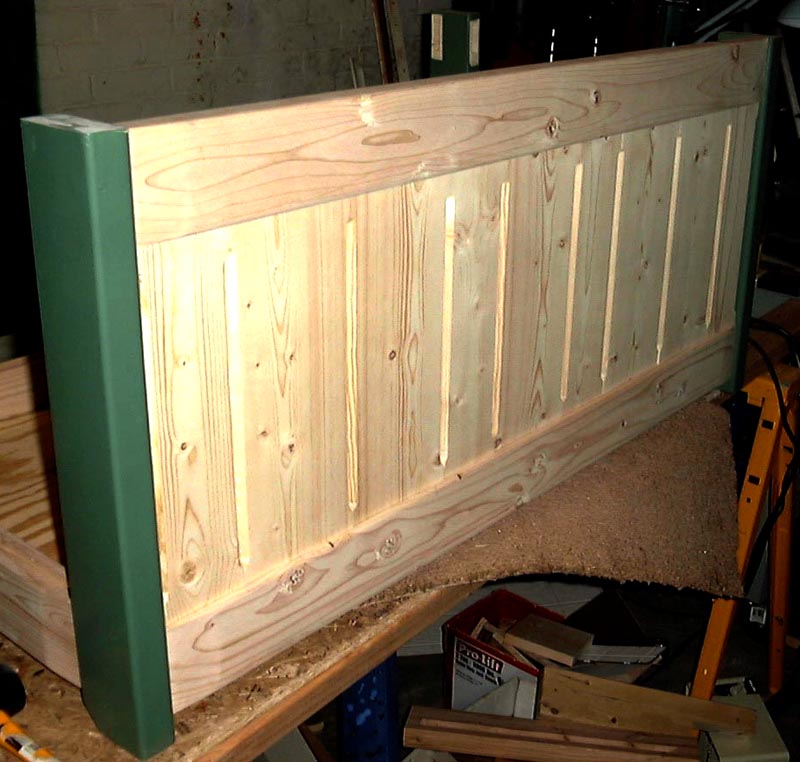
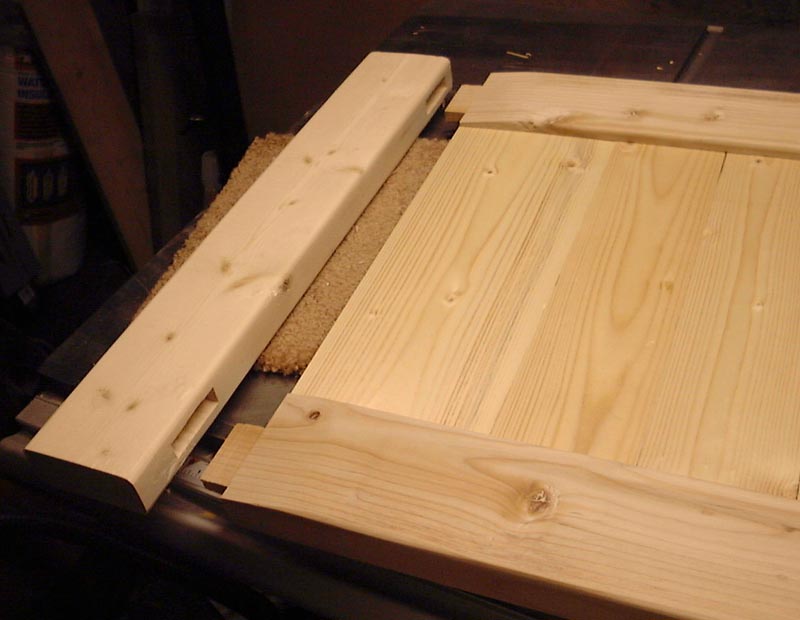
6) Up And At 'em. Here's the front of the chest. You can see the how the corner chamfers meet and form a groove between each board. The arrangement of the 9 boards for the front and back were designed to be symmetrical with a center board and 4 pieces on each side. I fiddled with the arrangement of 1x4s and 1x6s until I came up with something near the overall length of 40". The end panels were done the same way, but using 4 boards - two 1x4s and two 1x6s. Those combinations of 1bys decided the final length of the top and bottom cross pieces.
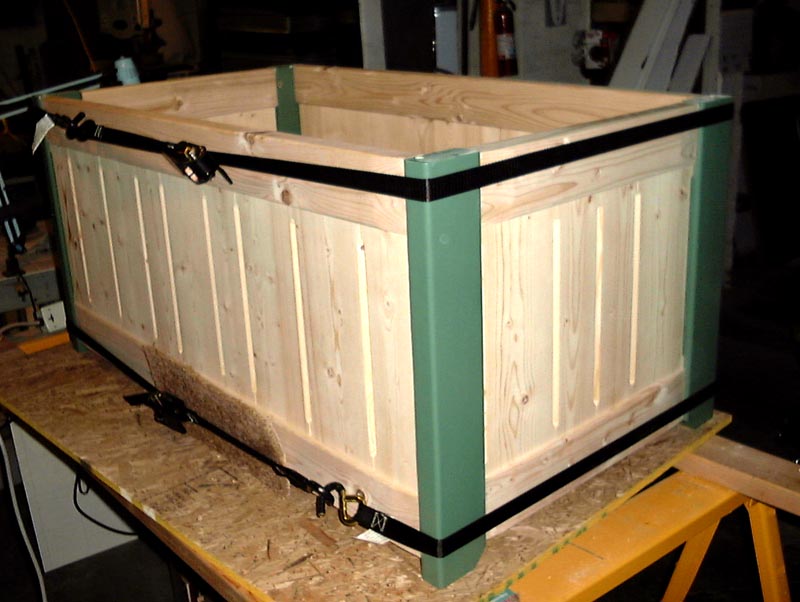
7) Clamps 201. Here are the four sides clamped together. The plywood bottom is trapped within its dadoes as well. It went together surprisingly well since everything trapped everything else. I assembled the two long sides and let the glue dry; then assembled all four.
I used cargo tie down straps to clamp the full chest together. You can see a piece of carpeting I used to protect the wood from the metal clamp. Small scraps of carpet come in handy to protect softwood while it's being worked.

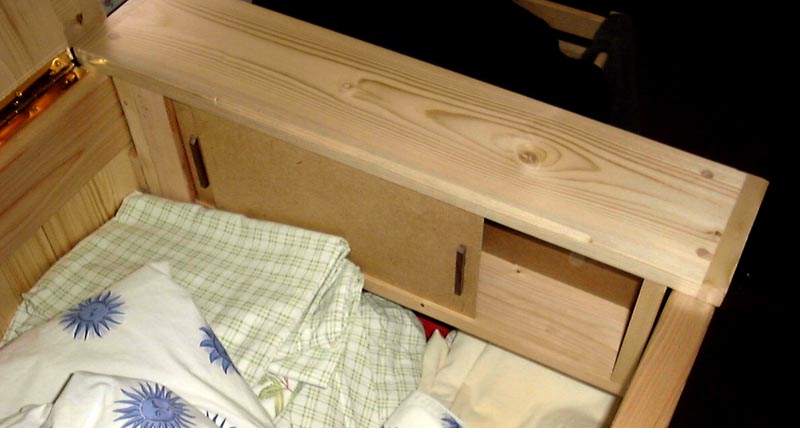
8) A Side of Shelf. The two side shelves. Each one has a couple of doors that slide in grooves cut into the top and bottom. The shelves will eventually be mounted on the top of the chest and help hold the box together as well as make a nicer looking top.
Note the chamfer on the top of the shelf. This will meet with other chamfers on the lid itself to continue the grooves on the chest.
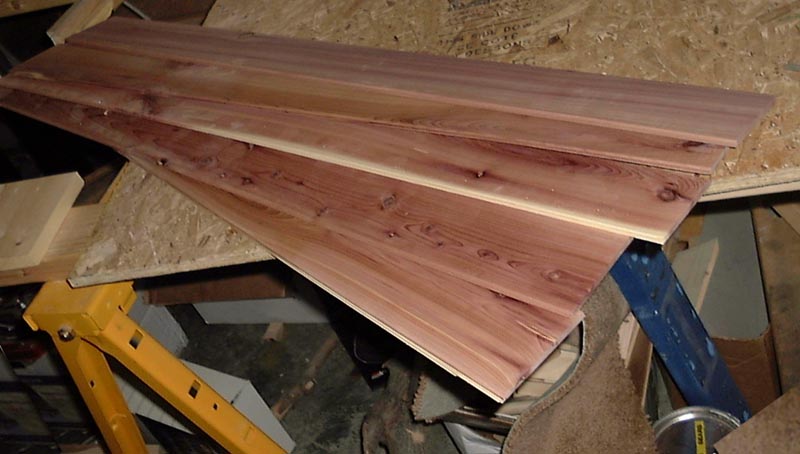
9) Smelly Slats. I bought a pack of aromatic cedar paneling to use as a liner for the chest floor. This is laid on the 1/2" plywood and is tacked down with staples. I used a 45 degree angle piece of painted wood on each of the short sides of the chest to cover the cut edges of the cedar and the staples holding them in.
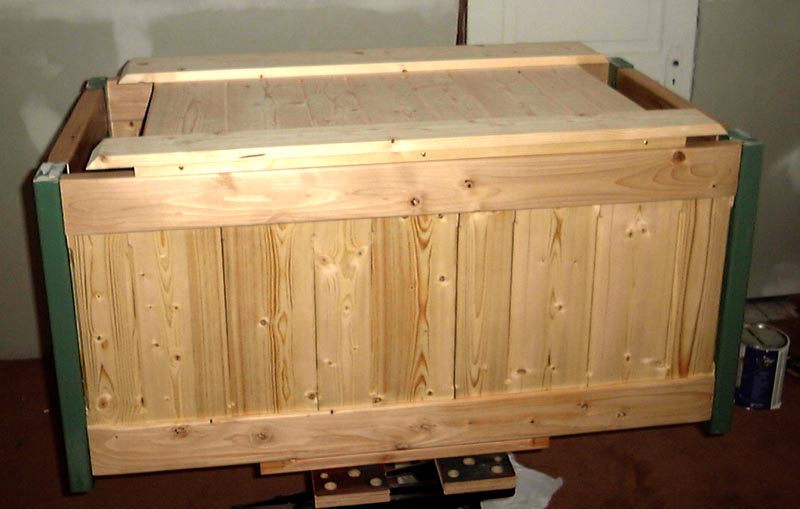
10) All Together Now. The chest is assembled and the top is shown in place. The top follows the same general design as the sides, but is held together with crosspieces at the front and rear. I don't think I'll have expansion problems since each board is held individually and not all glued together - but time will tell.
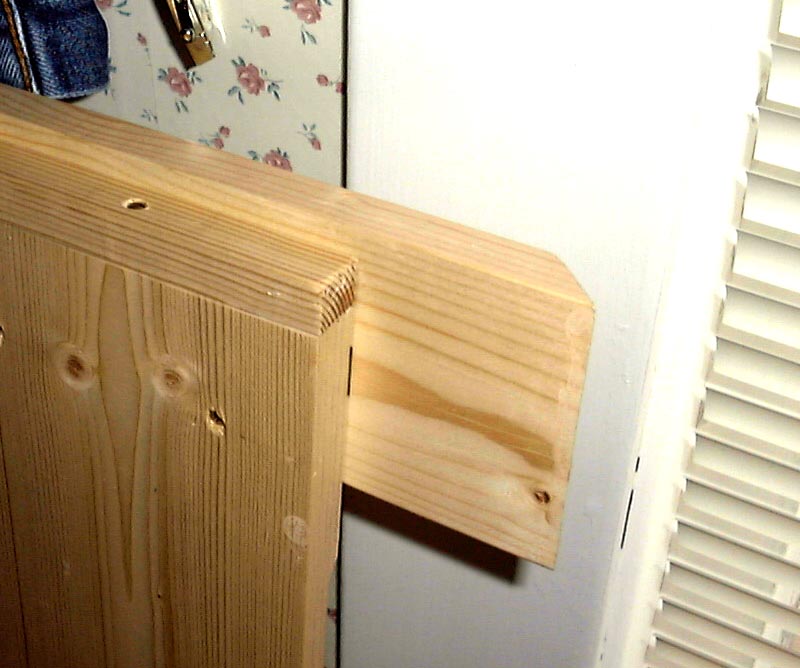
11) Finger Me This. The front cross piece overhangs to provide a finger grip when lifting the top. There is a 3/4" by 3/4" strip of wood that covers the end grain of the lid from the front. The end grain is exposed at the rear of the lid.
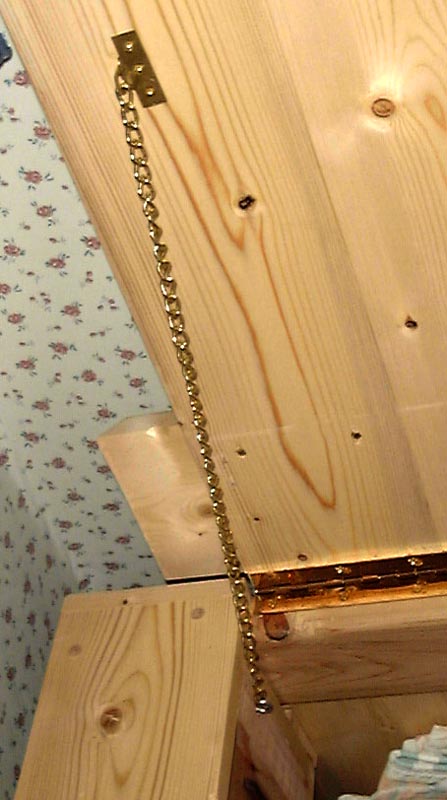
12) Hang In There. Here's what I ended up for the lid support. I cut, drilled and bent some sheet brass to make an eyelet on the lid and then countersunk a screw eye into one of the side shelves. I then used a length of brass chain to connect the two. My only doubt is here is if the brass is stout enough to stand the pulling without bending.
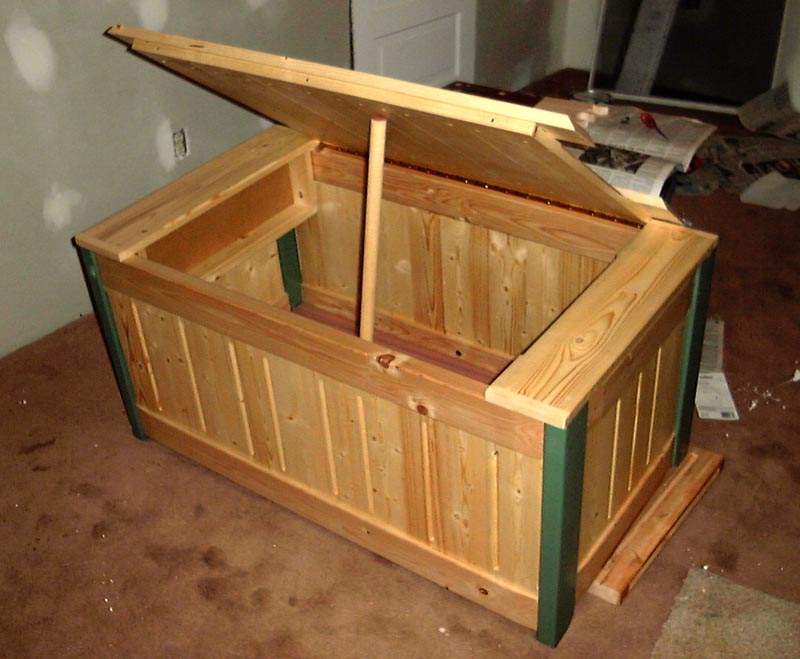
13) It's Alive! And it all works together. I used a piano style hinge for the lid. I originally planned on using the toy chest style lid supports, but because of the way the chest was constructed, the ones I had didn't work too well and I had to take them off.
14) Soft Touch. Here's a completed side shelf unit. The doors got a bit of walnut for a pull handle. Each shelf is held on with four screws from the top that were countersunk and then pegged with dowel to hide the screw.
I used an old Stanley ratchet screwdriver to put the #12 brass screws in and broke the first one I tried. I then used a bit of beeswax to lube each screw and had no more problems. The screws and screwdriver came from my dad and are probably over 40 years old.
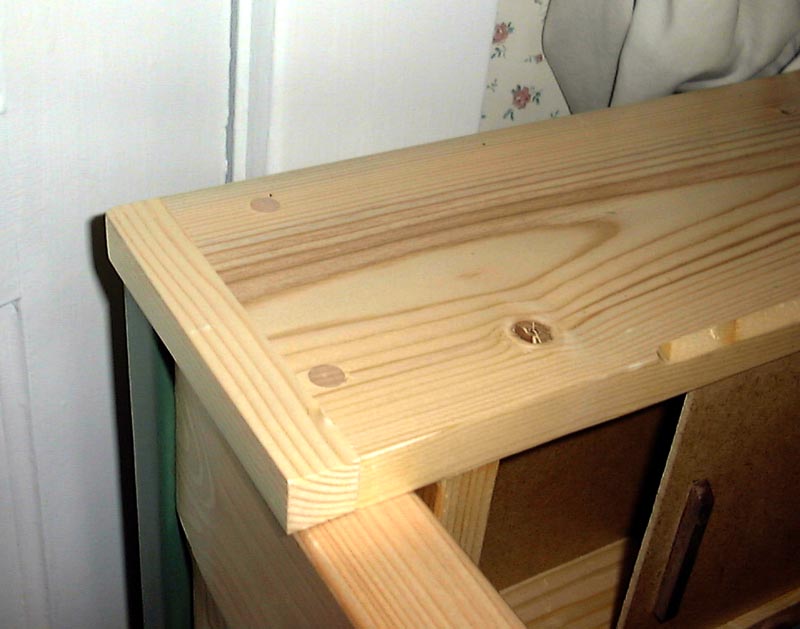
15) Peggers. This shows the pegged screw holes. I also used a piece of pine to cover the end grain.
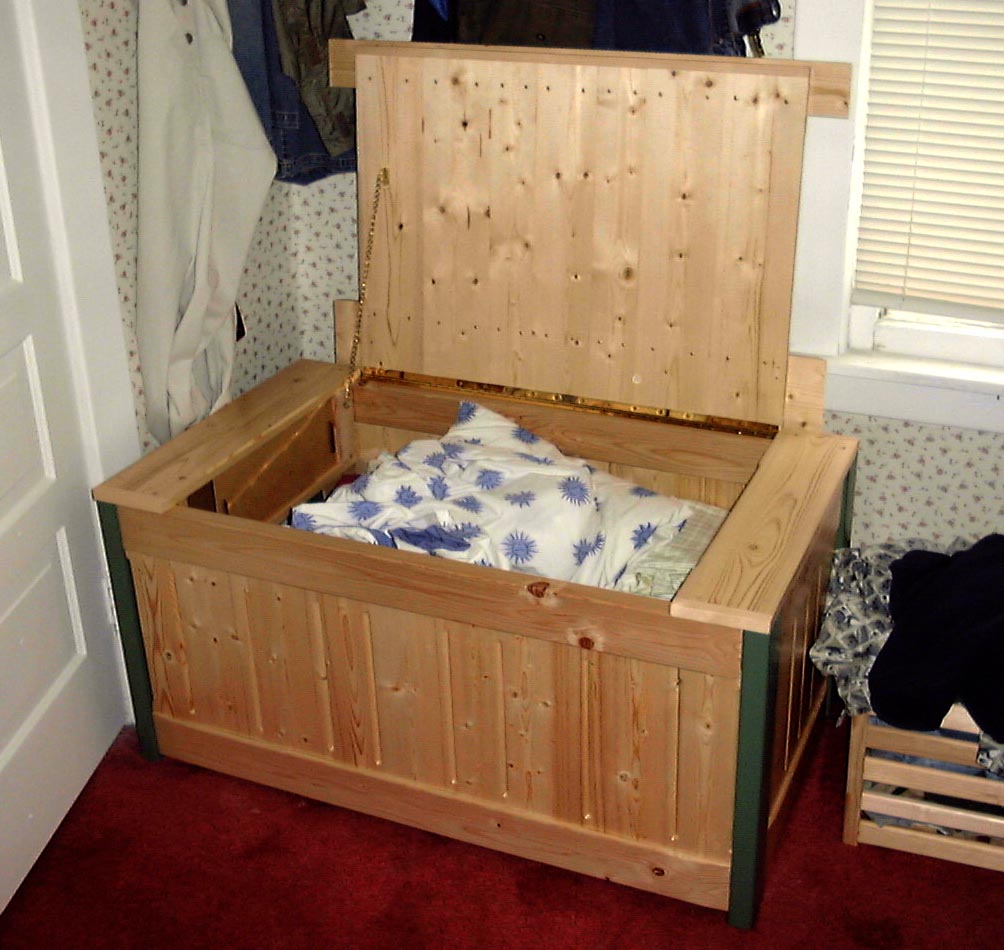
16) Finito! After a couple of months here's the final product in use.
Dados and tenons were cut with a Craftsman table saw using a CHEAP Harbor Freight Dado Blade. I used a Delta drill press and Delta mortising attachment to cut the mortises. Most all 90 degree cuts were made with a DeWalt 10" miter saw.
All pieces were sanded with a Makita orbital sander and finished with 3 or 4 coats of Minwax Polycrylic Satin. Most of the glue used was Titebond III with a 15 minute epoxy filling in some places. Most fasteners were brass wood screws with a brass plated piano hinge and chain also used. The brass for the chain mount came from some old trophy plaques I scrounged back in 1987 from the trash at the 7401st MUNSS in Rimini Italy.
Plans. Ha, ha, ha - yeah right. My plans are pretty much only rough sketches. For the most part, I cut to fit parts after coming up with one or two basic dimensions that everything else is derived from. In this case, the overall dimensions were around 40x22x22 which I came up with after looking at some other blanket chests online. Then I had 1x4s, 1x6s and 2x4s for widths. Everything else fit those dimensions. If you're really interested, I have included a couple of pages of sketches; sketch 1, sketch 2.